 Save to Pinterest
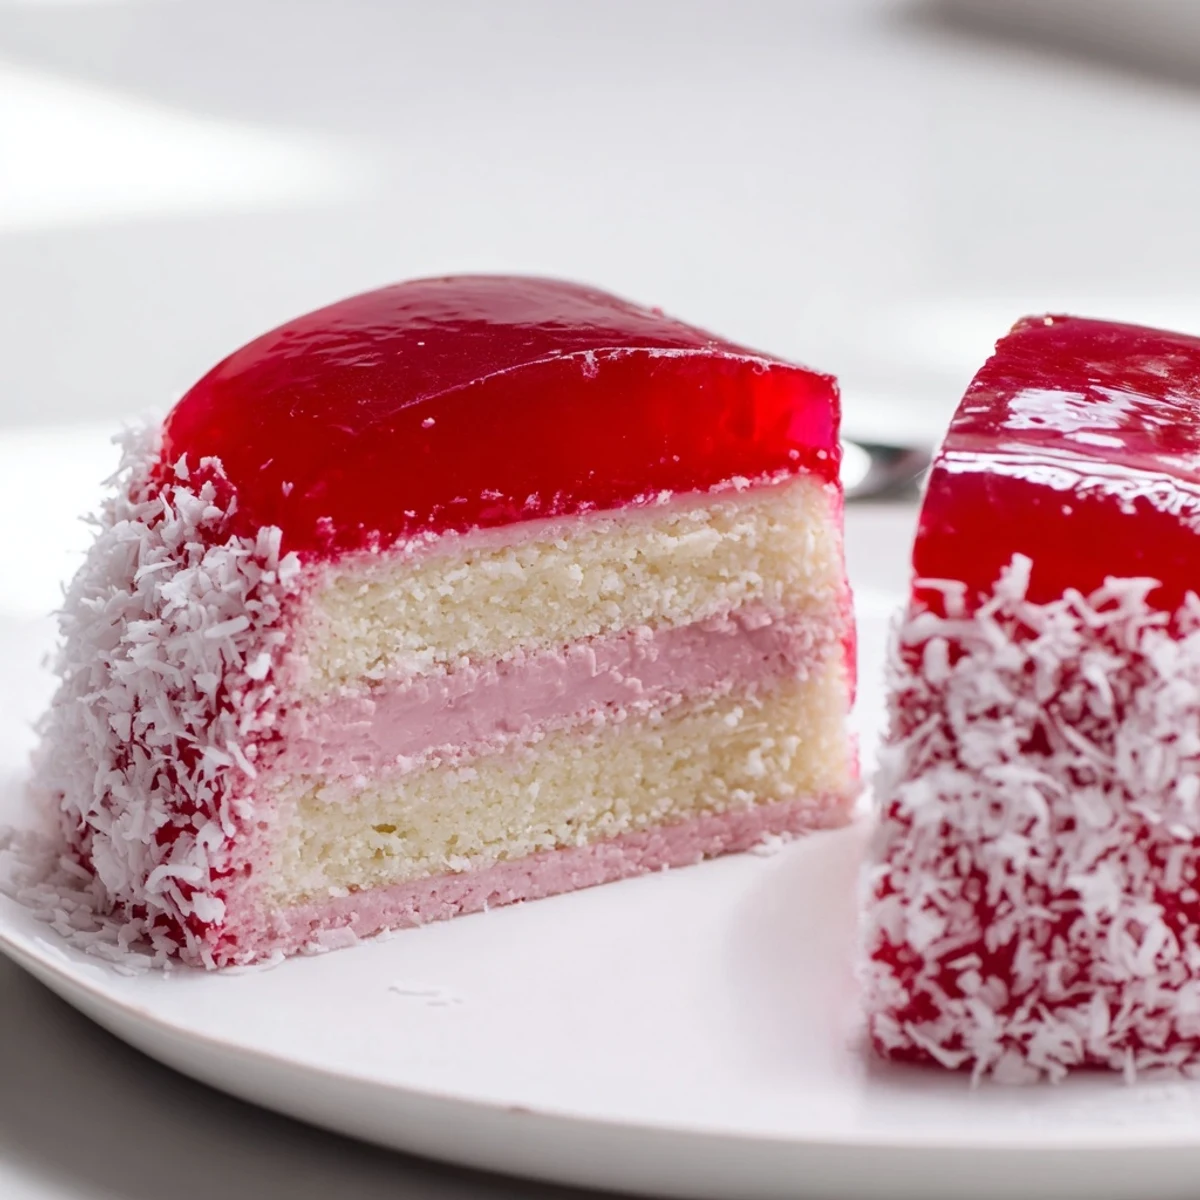
 These old-fashioned pink jelly cakes begin with a light, buttery tray sponge cut into small squares. Whip thickened cream with a touch of icing sugar and vanilla, sandwich the sponge squares, then dip each pair into semi-set raspberry jelly so the coating clings. Roll in desiccated coconut and chill to finish; the result is tender, nostalgic tea-time treats with a glossy jelly shell.
The afternoon light through my grandmothers kitchen window always seemed pink, probably because she kept jelly cakes under a glass cloche on the counter and the raspberry tint colored everything. She never measured anything, just folded and dipped with the confidence of someone who had made these a thousand Sundays before I was born. When I finally asked for her method at twenty three, she waved her hand and said oh darling you just feel it, which was spectacularly unhelpful at the time. It took me four attempts and a very sticky kitchen bench to understand what she meant.
I brought a tray of these to a friends backyard engagement party once, setting them on a cake stand between the sausage rolls and spinach filos. Within ten minutes a woman I had never met tapped my shoulder and said very seriously, my mother made these exact cakes, where did you learn. We stood there for twenty minutes trading memories of coconut stuck to our fingers as children.
Ingredients
- Unsalted butter (125 g, softened): The sponge needs fat at room temperature to cream properly, so pull it out an hour ahead and do not rush this.
- Caster sugar (125 g): The fine granules dissolve into the butter faster than regular sugar, giving you that silken crumb.
- Large eggs (2): Room temperature eggs incorporate more air, which is the entire personality of a good sponge.
- Vanilla extract (1 tsp): Use real extract, not imitation, because the flavor here is gentle and anything artificial will clang.
- Self-raising flour (180 g, sifted): Sifting is not optional ceremony here, it is the difference between a cloud and a brick.
- Milk (100 ml): Added gradually to keep the batter loose and silky.
- Raspberry jelly crystals (85 g packet): Raspberry is traditional and gives that signature blush, though strawberry works in a pinch.
- Boiling water (250 ml) and cold water (150 ml): For dissolving and tempering the jelly to the right consistency for dipping.
- Thickened cream (200 ml): Whipped to firm peaks, it becomes the soft center holding everything together.
- Icing sugar (1 tbsp): Just enough sweetness for the cream without overwhelming it.
- Vanilla extract (1/2 tsp): A second small dose for the filling.
- Desiccated coconut (100 g): The final snowy coat that makes these look like they arrived from another era.
Instructions
- Prepare the oven and tin:
- Heat the oven to 180 degrees Celsius, grease a 20 by 30 centimeter baking tin, and line the base with baking paper so nothing sticks later.
- Cream butter and sugar:
- Beat the softened butter and caster sugar together with an electric mixer until the mixture turns pale and looks almost whipped, about three to four minutes of patience.
- Add eggs and vanilla:
- Crack in one egg at a time, beating well between each, then pour in the vanilla and let the mixer run until everything looks glossy and combined.
- Fold in flour and milk:
- Alternate additions of sifted flour and milk, folding gently with a large spoon or spatula, stopping the moment you see no dry flour.
- Bake the sponge:
- Spread the batter evenly in the tin and bake twelve to fifteen minutes until the top springs back lightly under your fingertip and a skewer comes out clean.
- Cool completely:
- Let the sponge rest in the tin for ten minutes, then turn it onto a wire rack and walk away until it reaches full room temperature.
- Prepare the jelly:
- Dissolve the jelly crystals in boiling water, stir in cold water, pour into a shallow dish, and refrigerate until it thickens to a wobbly, syrupy consistency around forty five to sixty minutes.
- Cut and fill:
- Cut the cooled sponge into twenty four even squares, whip the cream with icing sugar and vanilla to firm peaks, then sandwich pairs of squares together with a generous spoonful.
- Dip and coat:
- One by one, dip each filled cake into the semi set jelly, rolling gently to coat all sides, let the excess drip off, then roll immediately in desiccated coconut and place on a wire rack.
- Chill and serve:
- Refrigerate the finished cakes for at least thirty minutes so the jelly sets firmly and the coconut holds, then arrange on a plate and watch them vanish.
 Save to Pinterest
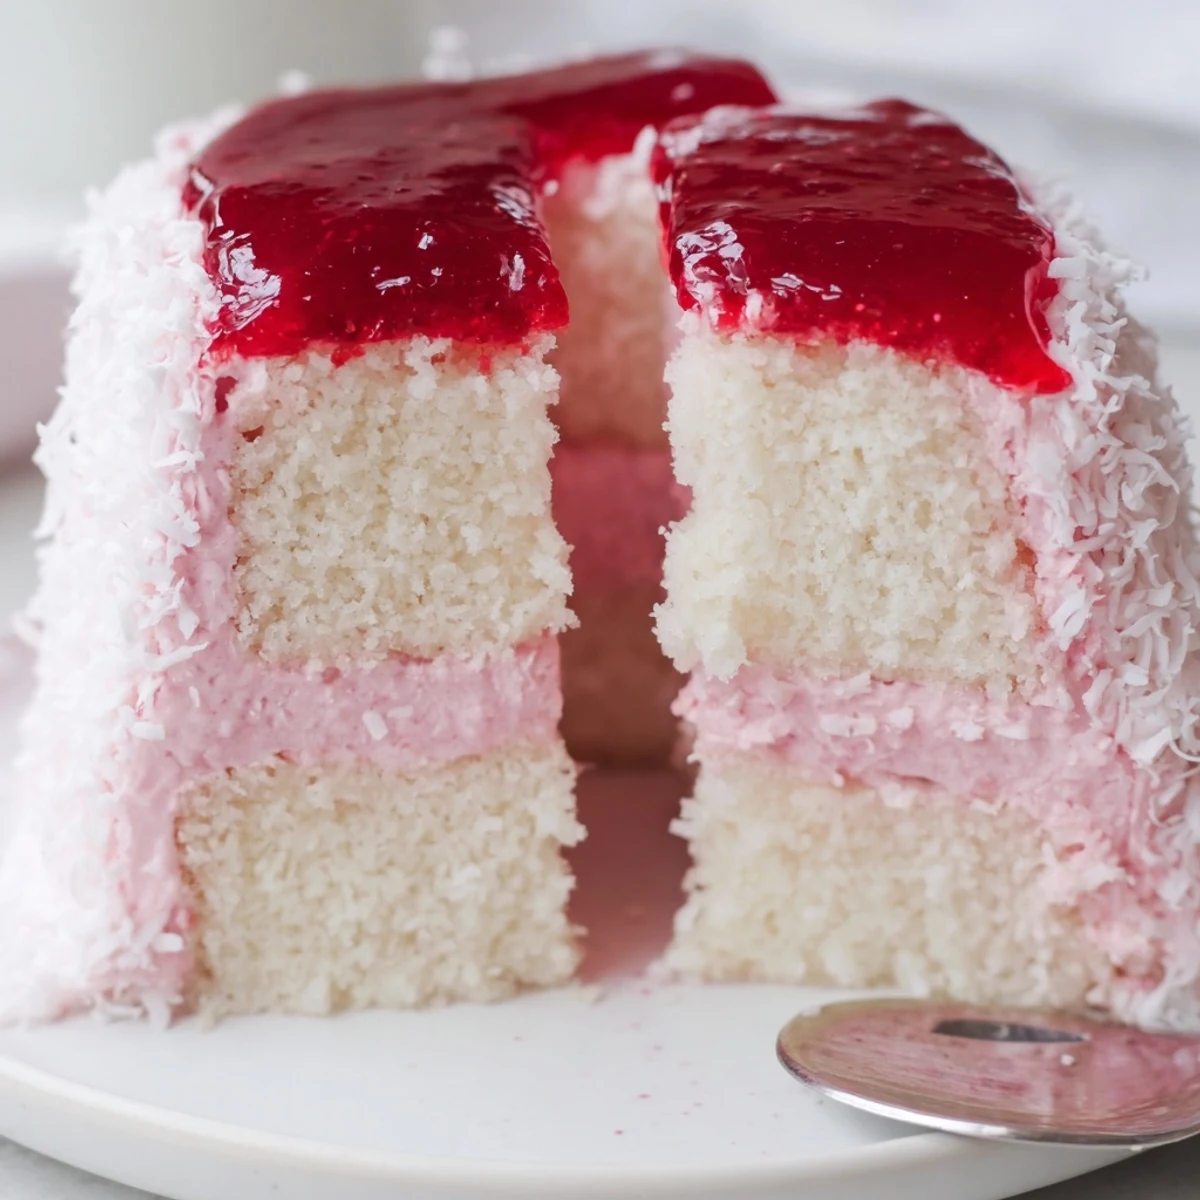
 There is something quietly theatrical about the dipping stage, when each plain little sandwich transforms into something jeweled and absurdly pretty. I always end up with coconut on my elbows and jelly on my wrists regardless of how careful I am.
Getting the Jelly Consistency Right
The jelly is the trickiest part of this entire recipe and the reason most people give up after one try. You want it thick enough to cling to the sponge but loose enough that you can actually roll the cake through it without it feeling like wading through glue. Check it every ten minutes once it has been in the fridge for half an hour, tilting the dish to see how it flows.
Choosing Your Coconut
Desiccated coconut gives the most traditional texture, a fine dry snow that adheres evenly to the sticky jelly surface. Shredded coconut works but looks wilder and less refined, which may be exactly what you prefer if you are not chasing nostalgia. I once used sweetened coconut by accident and the cakes were cloying, so check the label carefully.
Serving and Storing
These cakes are at their absolute best on the day they are made, when the sponge is still soft and the jelly has not had time to seep inward and make things soggy. If you must store them overnight, keep them in a single layer in an airtight container in the refrigerator.
- Bring them to room temperature for fifteen minutes before serving so the sponge softens again.
- Do not stack them or the coconut will press flat and the jelly will smudge.
- A light dusting of extra icing sugar on the plate makes everything look intentional.
 Save to Pinterest
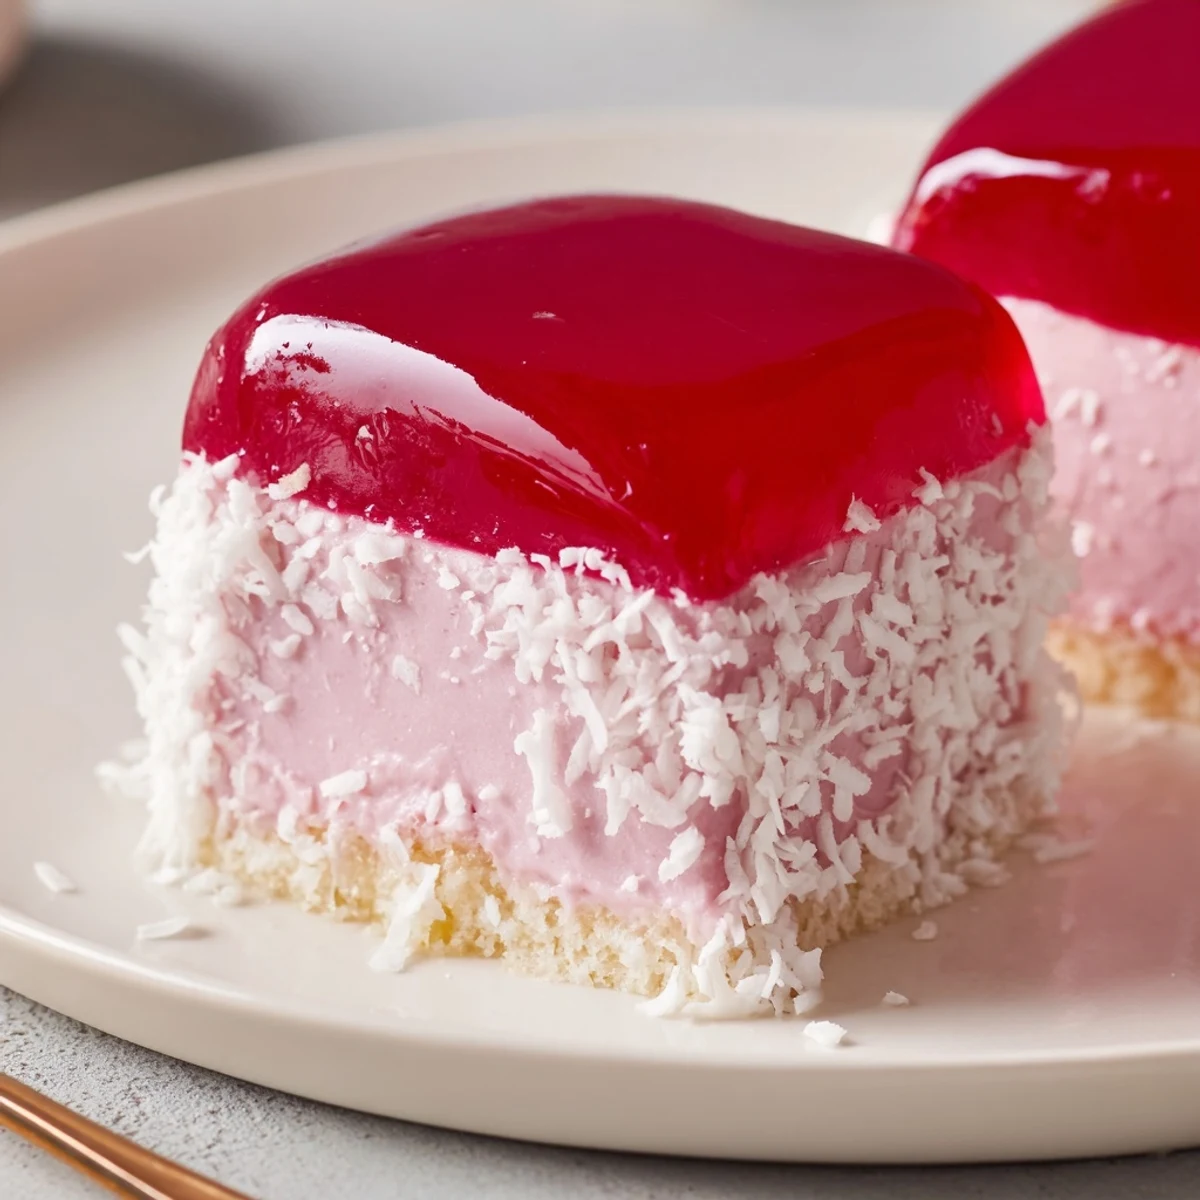
 Every time I make these I think of my grandmother standing at her kitchen bench with coconut dusted across her apron, humming something tuneless and content. Some recipes are just food, but these are a conversation across decades, sticky fingers and all.
Recipe FAQs
- → How do I know when the jelly is at the right 'semi-set' stage?
-
The jelly should be noticeably thicker than warm liquid but still pourable and tacky. It will have a slight skin and wobble when you stir; test by dipping a spoon—if it coats without running off quickly, it's ready for dipping.
- → Can I use other jelly flavours instead of raspberry?
-
Yes. Strawberry, passionfruit or orange work well. Choose a flavour with a clear gloss to achieve the classic pink sheen; adjust sweetness if using stronger citrus gels.
- → What is the best way to get the sponge light and tender?
-
Cream the butter and caster sugar until pale and fluffy, add eggs one at a time, then fold in sifted self-raising flour alternately with milk to avoid overmixing. Bake briefly until a skewer comes out clean to keep the crumb soft.
- → How can I make a dairy-free version?
-
Substitute dairy butter with a plant-based buttery spread and use whipped coconut cream in place of thickened cream. Ensure coconut cream is well chilled and whipped to firm peaks before assembling.
- → When is the best time to roll the cakes in desiccated coconut?
-
Roll immediately after dipping while the jelly surface is still tacky so the coconut adheres evenly. If the jelly firms too much, it will not stick well; if too soft, the coating will slide off.
- → How should I store the finished cakes and how long do they keep?
-
Store in a single layer in the refrigerator on a wire rack or shallow tray covered loosely. They are best eaten the same day or within 24–48 hours for optimal texture; the coconut may soften over time.
