 Save to Pinterest
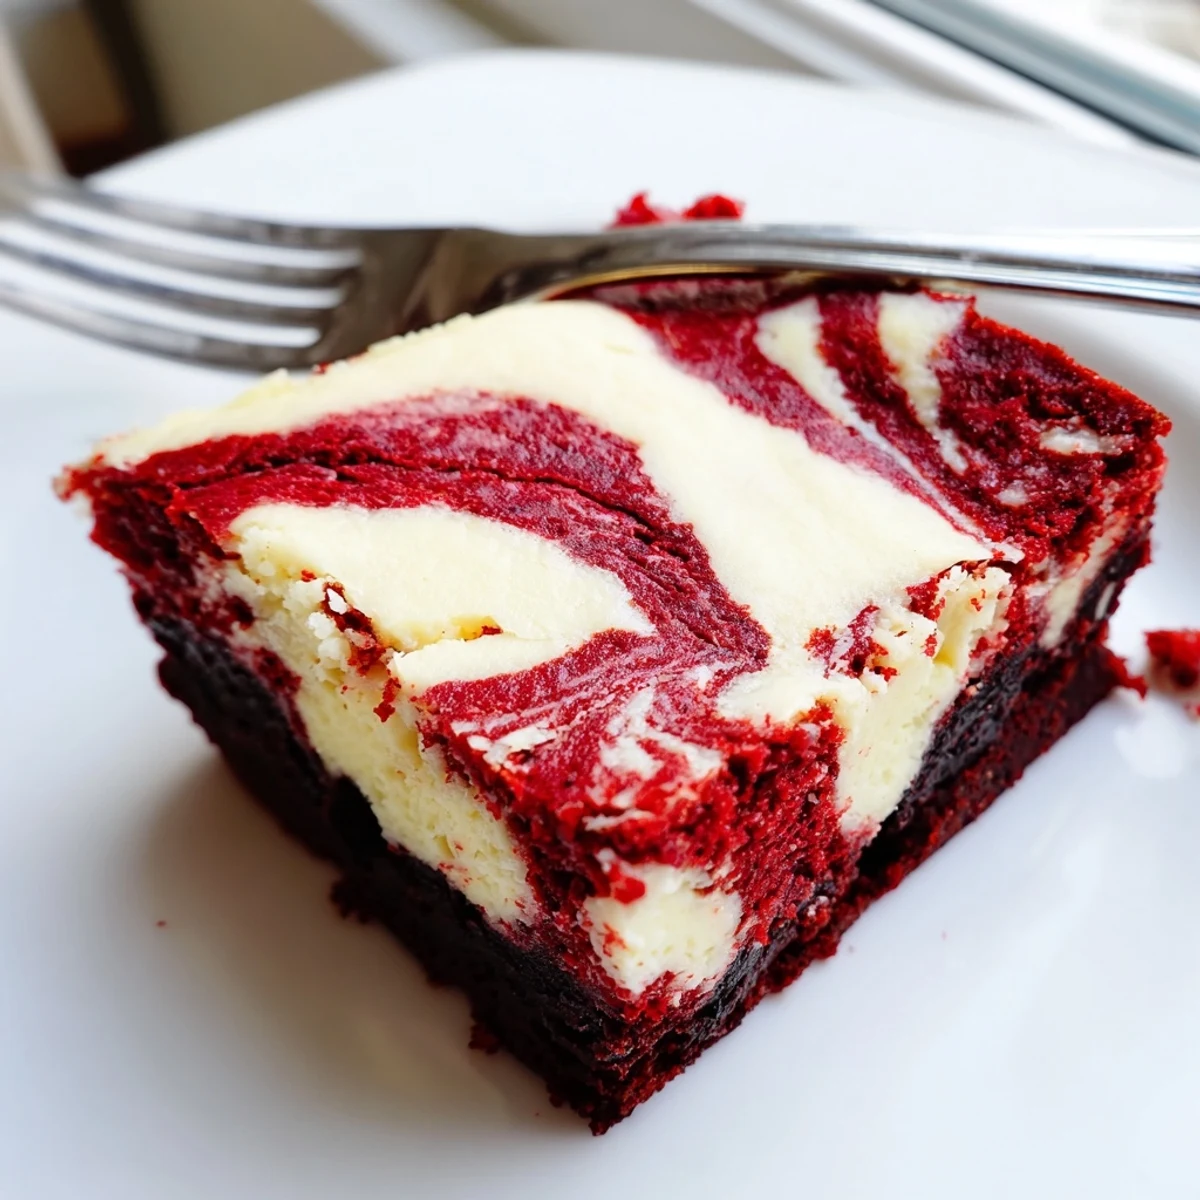
 These indulgent treats combine the best of both worlds: rich, fudgy red velvet brownie base meets tangy, creamy cheesecake swirls. The striking marbled pattern makes them perfect for special occasions, while the contrasting textures—dense chocolatey bottom and smooth cheesecake top—create an unforgettable eating experience.
Ready in under an hour, these brownies deliver restaurant-quality results with simple techniques. The secret lies in gently swirling the two batters together, creating that signature marble effect. Serve chilled for firmer slices or at room temperature for ultimate fudginess.
The first time I made these, I was hosting a Valentine's dinner and completely forgot dessert until an hour before guests arrived. These red velvet cheesecake brownies saved my reputation that night, and they've been my emergency showstopper ever since. There's something magical about cutting into that marbled swirl and watching people's eyes light up.
My sister asked for the recipe after just one bite, and now she makes them for every potluck. Last Christmas, we accidentally used too much food coloring, turning the brownies an almost alarming shade of crimson. Everyone still fought over the last piece, proving that taste matters more than perfect presentation.
Ingredients
- Unsalted butter: Melt it completely and let it cool slightly before mixing, or you'll scramble your eggs when they hit the warm butter
- Granulated sugar: This creates that crackly, shiny top that makes bakery brownies so irresistible
- Large eggs: Room temperature eggs incorporate better and give you that tender, fudgy texture we're after
- Vanilla extract: Don't skimp here, pure vanilla makes all the difference in the final flavor
- Red food coloring: Gel coloring gives you that vibrant red without adding extra liquid to your batter
- All-purpose flour: Measure by spooning and leveling, not scooping directly, to avoid dense brownies
- Unsweetened cocoa powder: Dutch-processed gives you that deep, rich chocolate flavor without bitterness
- Salt: Just a pinch balances the sweetness and makes the chocolate flavor sing
- Cream cheese: Make sure it's completely softened or you'll have lumps in your swirl
Instructions
- Prep your pan and oven:
- Heat your oven to 350°F and line an 8x8 inch pan with parchment paper, letting the edges hang over like handles. This trick saves you so much hassle later when lifting the whole batch out.
- Mix the brownie batter:
- Whisk melted butter and sugar until they turn silky and smooth. Add eggs, vanilla, and red food coloring, then whisk until everything's a gorgeous uniform red.
- Add the dry ingredients:
- Sift in flour, cocoa, and salt, then fold with a spatula just until the flour disappears. Overmixing here makes tough brownies, and nobody wants that.
- Layer the batters:
- Set aside 1/4 cup of red velvet batter, then spread the rest evenly in your pan. Pour cream cheese mixture over top, smoothing it like you're frosting a cake.
- Create the swirl:
- Drop spoonfuls of reserved red batter onto the cream cheese layer, then drag a knife through in figure eights. Don't overdo it, or you'll lose that beautiful marbled pattern.
- Bake to perfection:
- Bake 33 to 36 minutes until the center barely jiggles and a toothpick comes out with moist crumbs. Cool completely before cutting, or they'll fall apart.
 Save to Pinterest
 These became my daughter's birthday request three years running. She waits by the oven, watching through the glass door as the red swirls develop, then asks every five minutes if they're cool enough to cut.
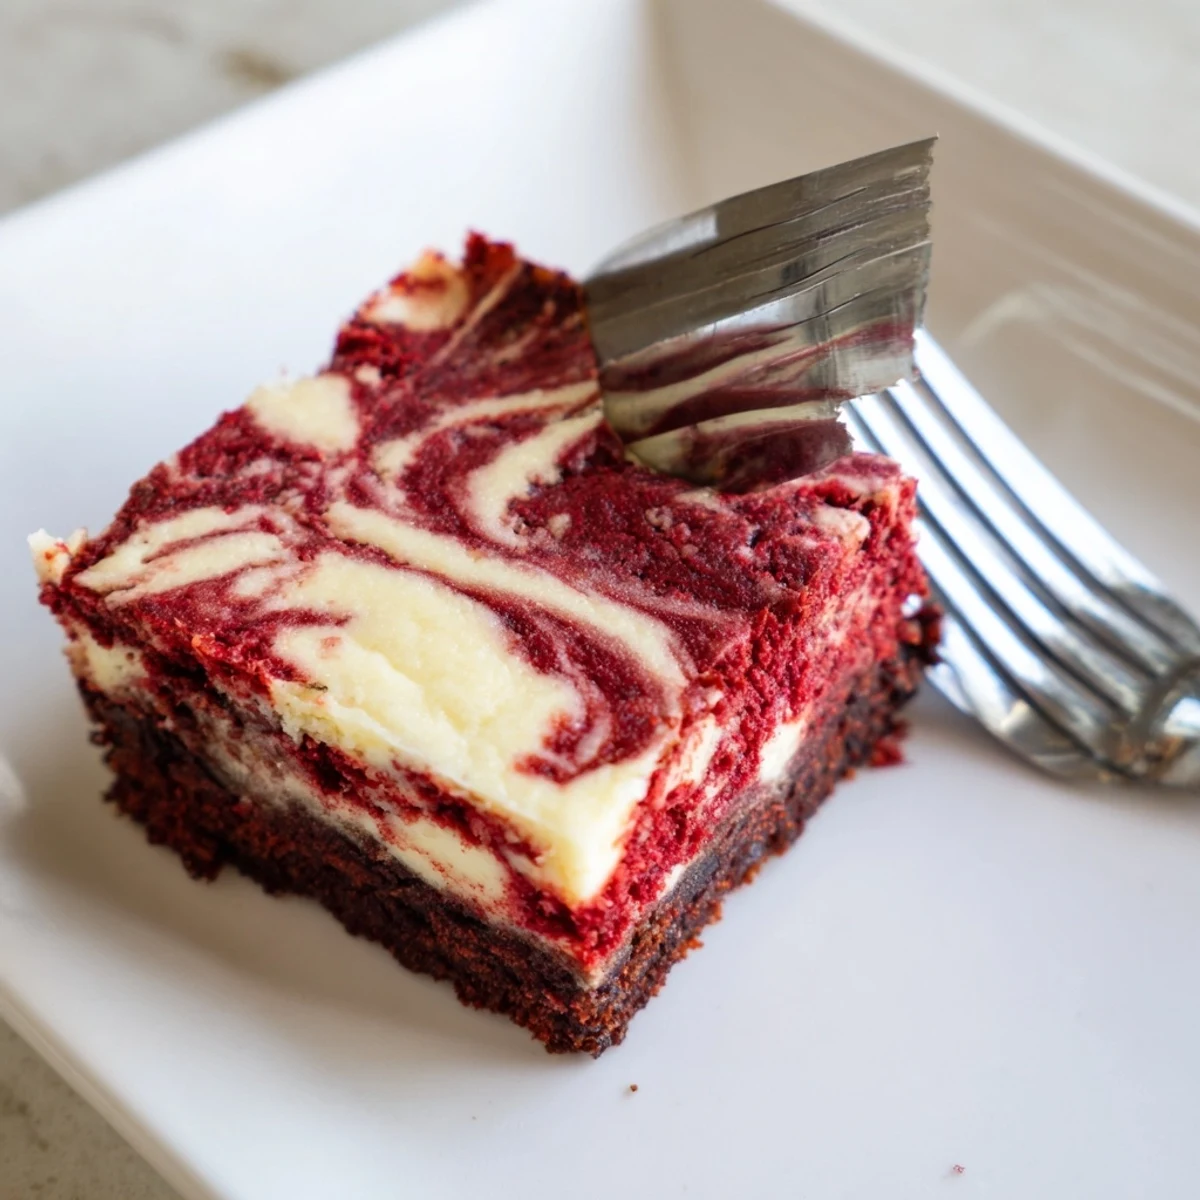
Making The Perfect Swirl
I've learned that the trick to those gorgeous marble patterns is using just the lightest touch. Run your knife through the batters in a single continuous motion, pulling straight up instead of dragging back and forth. Too much swirling and you'll end up with muddy brown batter instead of those distinct red and white ribbons that make these so stunning.
Room Temperature Matters
Cold ingredients are the enemy of smooth, creamy cheesecake swirls. I set my cream cheese and eggs out on the counter about 30 minutes before I start baking. This small step prevents lumps in your cream cheese mixture and helps everything blend together into that silky, luxurious texture that makes these brownies so special.
Cutting Clean Squares
Nothing ruins the presentation faster than messy, crumbled edges. I chill my finished brownies in the refrigerator for at least two hours, then use a sharp knife wiped clean between each cut. A little hot water on the knife blade helps too, gliding through the layers like butter instead of dragging and tearing.
- Room temperature brownies are softer and more fudgy
- Chilled brownies hold their shape better for serving
- Either way, let them cool completely before cutting
 Save to Pinterest
 Every time I bring these to a gathering, at least three people ask for the recipe. They're that perfect combination of impressive-looking and actually achievable, the kind of dessert that makes you feel like a kitchen magician.
Recipe FAQs
- → How do I achieve the perfect marble swirl?
-
Drop spoonfuls of reserved red velvet batter over the cheesecake layer, then use a knife or skewer to gently drag through the batters in a circular or zigzag motion. Avoid over-swirling, which can muddy the distinct colors.
- → Why did my brownies sink in the middle?
-
Sunken centers often result from underbaking. The center should be just set when tested with a toothpick—moist crumbs are fine, but wet batter means more time is needed. Also ensure your cream cheese is fully softened to prevent air pockets.
- → Can I make these ahead of time?
-
Absolutely. These actually taste better after chilling overnight in the refrigerator, which allows flavors to meld and the cheesecake layer to firm up for cleaner cutting. Store in an airtight container for up to 5 days.
- → What's the best way to cut clean squares?
-
For neat cuts, chill the brownies thoroughly first. Use a sharp knife wiped clean between each slice, or run the knife under hot water and dry before cutting. The parchment overhang helps lift the entire block out easily.
- → Can I substitute the food coloring?
-
Natural beet juice or pomegranate juice can replace red food coloring, though the shade may be slightly more muted. For vibrant red without artificial dyes, use gel-based natural colorings specifically formulated for baking.
- → Why is my cheesecake layer not creamy?
-
Overmixing the cheesecake batter can cause it to become dense or grainy. Beat cream cheese and sugar just until smooth, then add the egg and vanilla gently. Room temperature ingredients also ensure proper emulsification.
