 Save to Pinterest
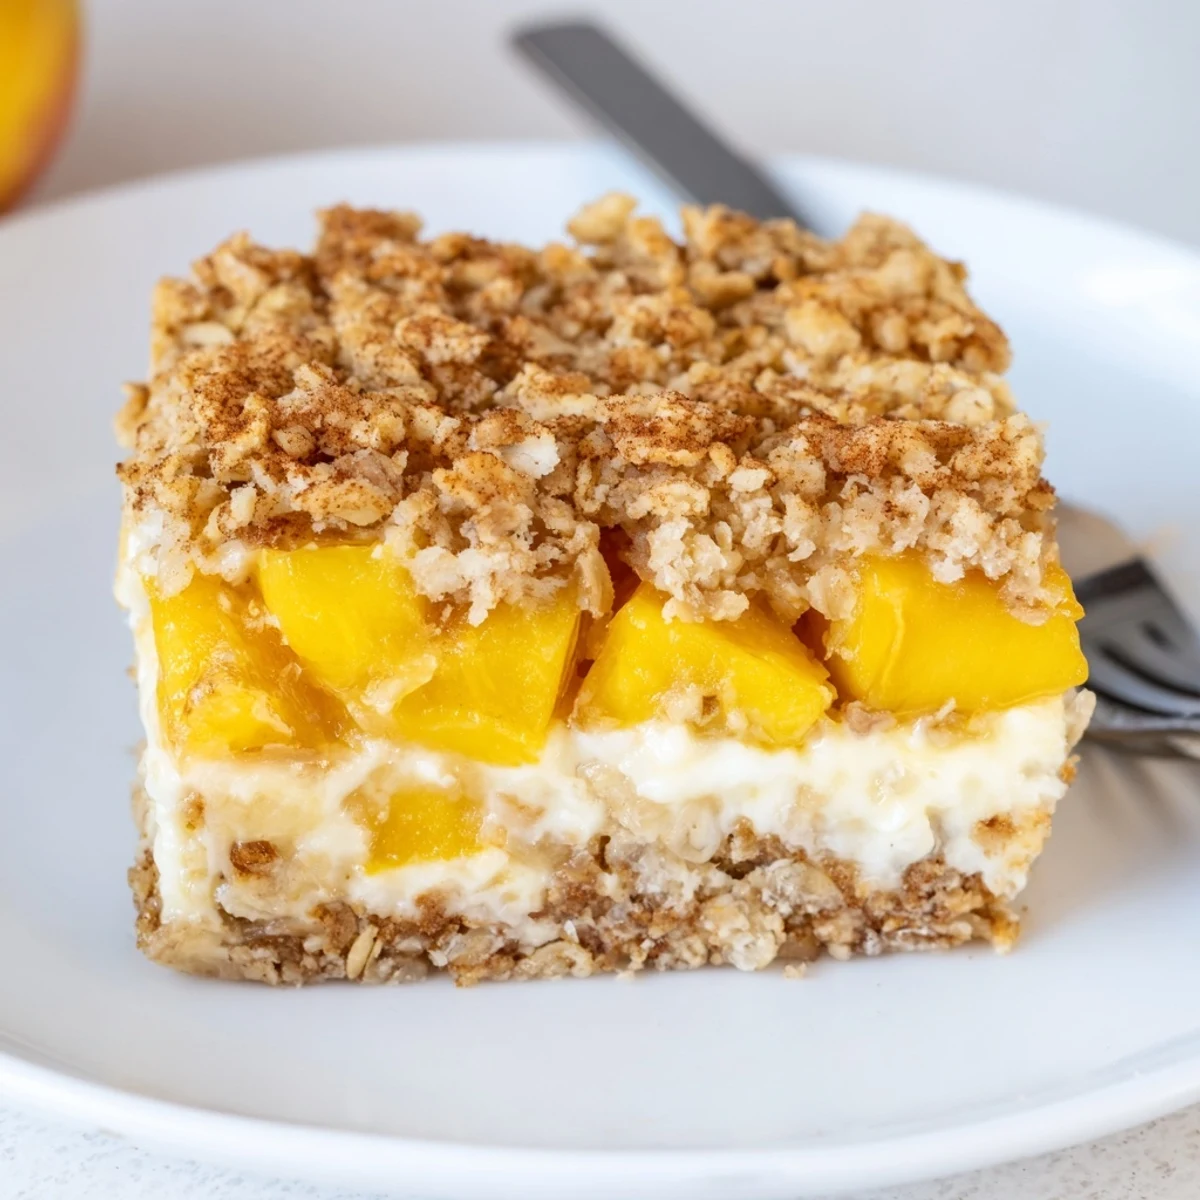
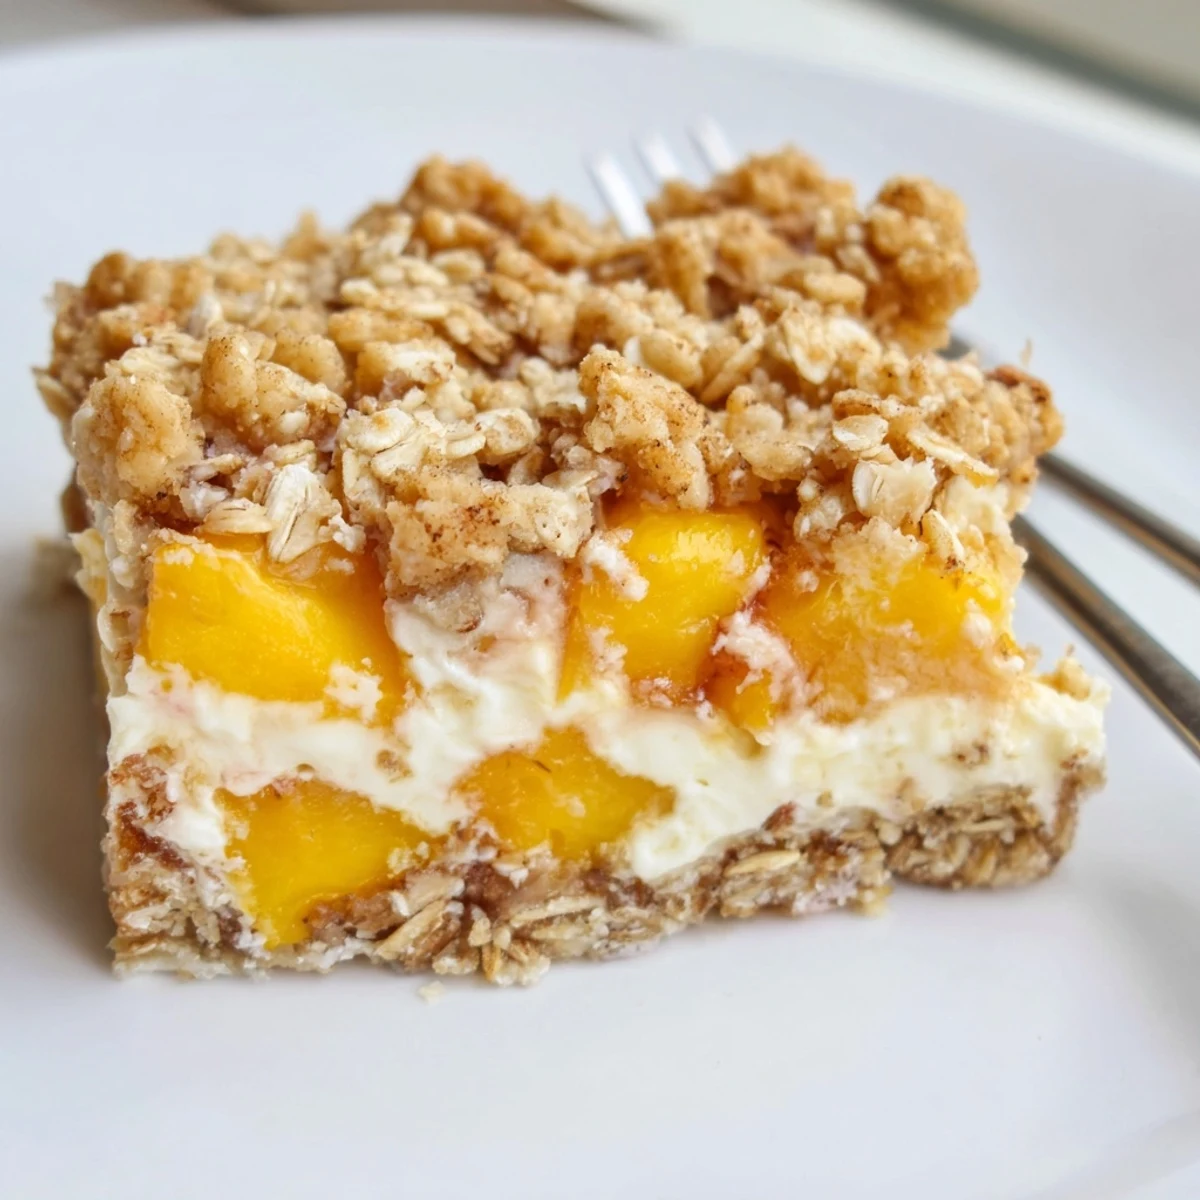
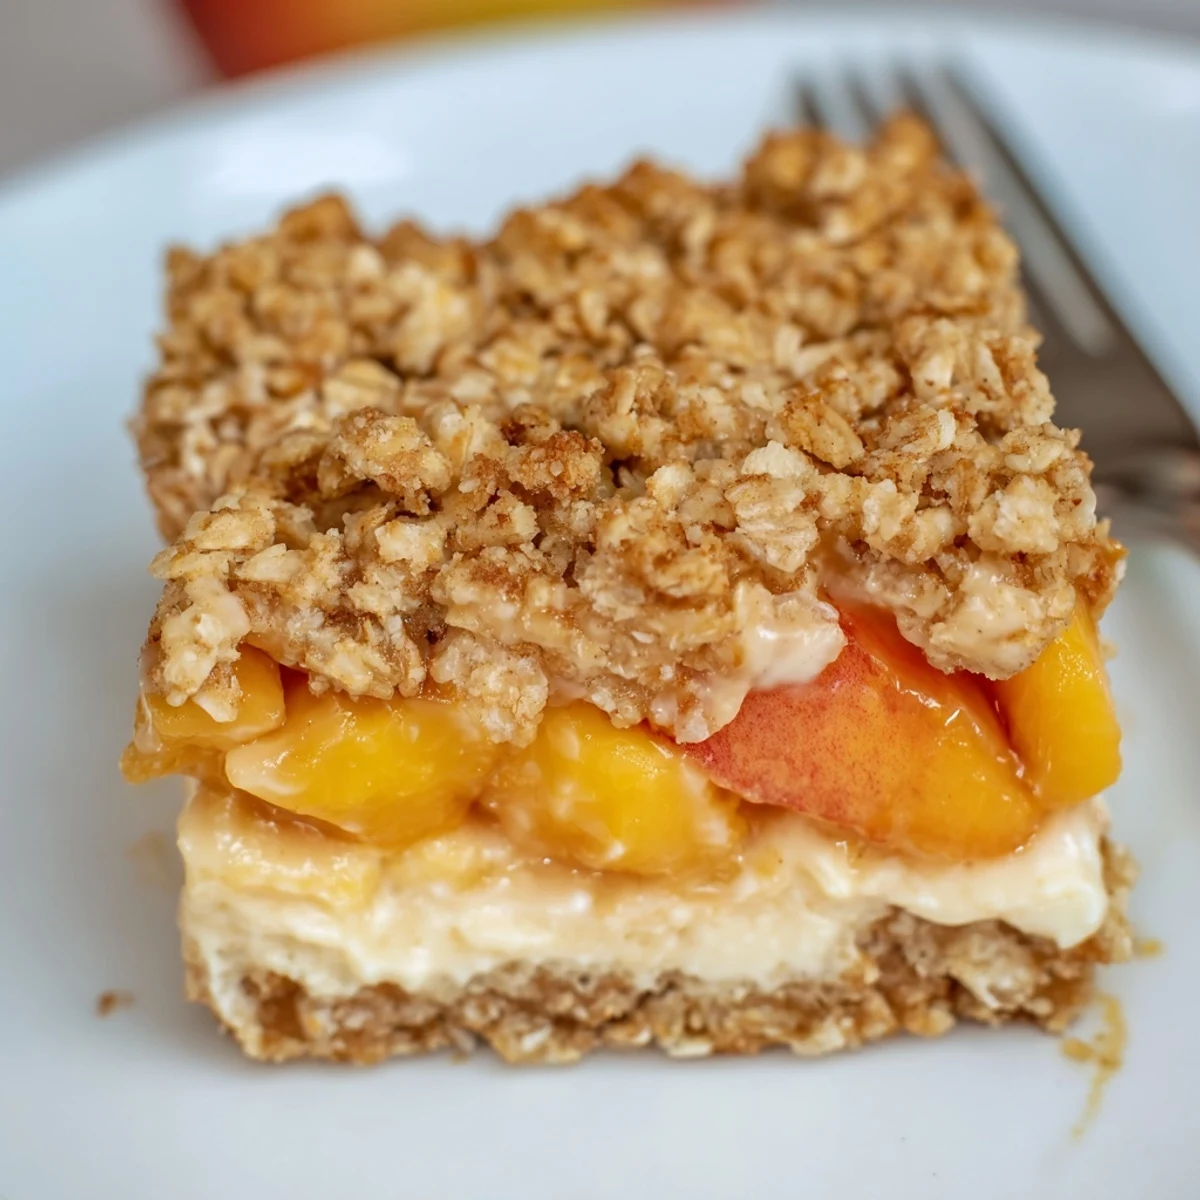
 These delightful bars feature three irresistible layers: a buttery oat crumble base, a rich cream cheese filling, and juicy peaches topped with more crumble. The combination of textures and flavors makes them perfect for summer gatherings, potlucks, or as an afternoon sweet treat with coffee or tea.
Preparation comes together in under 25 minutes, and the oven does the rest. The bars need to cool completely before slicing, making them ideal for preparing ahead. You can easily swap peaches for nectarines or mixed berries depending on what's in season.
The heatwave had been going on for days when my neighbor dropped off a paper bag heavy with tree-ripened peaches from her backyard. I could smell them through the bag, that honey-sweet perfume that only comes from fruit picked at peak ripeness, and I knew they wouldn't last long enough to just eat out of hand.
I brought these to a Fourth of July potluck last summer, and watched three different people ask for the recipe while still chewing their first bite. Something about that combination of warm crumble, cool cream, and fresh peaches just makes people stop what they're doing and pay attention to dessert.
Ingredients
- 2 cups all-purpose flour: Forms the sturdy base for your crumble, providing structure that holds up beautifully against the juicy fruit layers
- 1 1/2 cups old-fashioned rolled oats: Instant oats would turn to mush, so stick with these for that satisfying chewy texture and nutty flavor
- 1 cup granulated sugar: Sweetens the crumble evenly without making it cloying
- 1/2 tsp salt: A small amount that makes all the other flavors pop and prevents the bars from tasting flat
- 1/2 tsp ground cinnamon: Warm spice that bridges the gap between the buttery crumble and sweet peaches
- 1 cup unsalted butter: Must be cold and cubed, because this creates those irresistible flaky pockets in the crumble texture
- 8 oz cream cheese: Use full-fat here, softened to room temperature so it blends into a silky layer that sets up perfectly
- 1/3 cup granulated sugar: Just enough to tame the tang of the cream cheese while keeping it balanced
- 1 egg: Binds the cream filling together and helps it set into a smooth, sliceable layer
- 1 tsp vanilla extract: Pure vanilla makes all the difference here, adding depth to the cream layer
- 3 cups fresh peaches: Look for fruit that yields slightly to pressure, and peel them carefully so you dont lose any of that precious flesh
- 1 tbsp cornstarch: Thickens the peach juices just enough so they dont make your crumble soggy during baking
- 2 tbsp lemon juice: Brightens the peach flavor and keeps the fruit from tasting too sweet or one-dimensional
- 1 tbsp granulated sugar: A light sprinkle that draws out the peach juices without overwhelming their natural sweetness
Instructions
- Get your oven and pan ready:
- Preheat to 350°F and line a 9x13-inch pan with parchment, letting the paper hang over the sides for easy removal later
- Make the crumble base:
- Whisk flour, oats, sugar, salt, and cinnamon in a large bowl, then work in the cold butter with a pastry blender until you have uneven, pea-sized crumbs throughout
- Press your foundation:
- Take about two-thirds of the crumble mixture and press it firmly into your prepared pan, packing it down with the bottom of a measuring cup so it bakes into an even, solid layer
- Whip up the cream filling:
- Beat the softened cream cheese and sugar until completely smooth, then add the egg and vanilla and mix until no streaks remain
- Spread it evenly:
- Dollop the cream cheese mixture over your crust and gently spread it to the edges, being careful not to pull up any of the crumble base
- Prep the peaches:
- Toss your diced peaches with cornstarch, lemon juice, and that final tablespoon of sugar until everything is coated
- Layer the fruit:
- Arrange the peaches over the cream filling, placing them close together so every bite gets plenty of fruit
- Add the topping:
- Sprinkle your remaining crumble over the peaches, leaving some larger clusters for that irresistible crunch contrast
- Bake until golden:
- Bake for 38 to 42 minutes, rotating the pan halfway through, until the top is golden brown and the center barely jiggles when you give the pan a gentle shake
- The waiting game:
- Let the bars cool completely in the pan, then refrigerate for at least 2 hours so the layers can set up properly
- Slice and serve:
- Use the parchment paper to lift the whole thing out, then cut into 12 bars with a sharp knife, wiping the blade between cuts for clean edges
 Save to Pinterest
 My daughter now requests these for her birthday instead of cake, which feels like the highest compliment a dessert can receive. Theres something about pulling one out of the fridge in the middle of August, still cold and firm with those layers visible from the side, that just tastes like summer perfection.
Making Them Your Own
Switch out peaches for nectarines when you want something slightly less fuzzy but just as sweet. Mixed berries work beautifully too, though you might need an extra pinch of cornstarch since they release more juice than stone fruit.
Getting The Texture Right
Press the crumb base firmly but dont pack it down so hard that it becomes tough. You want it tight enough to hold together when sliced, but still tender enough to melt in your mouth. The bottom of a flat measuring cup works perfectly for this job.
Serving Suggestions
These bars shine on their own, but a scoop of vanilla ice cream turns them into something truly special. They also pair beautifully with whipped cream or a drizzle of warm caramel sauce if you want to dress them up.
- Cut them slightly smaller if serving alongside other desserts
- Store them in the refrigerator, covered, for up to 5 days
- Let cold bars sit at room temperature for 10 minutes before serving
 Save to Pinterest
 Hope these bring a little summer sunshine to your kitchen, no matter the season.
Recipe FAQs
- → Can I use frozen peaches instead of fresh?
-
Yes, frozen peaches work well in these bars. Thaw them completely and drain thoroughly before tossing with cornstarch and lemon juice to prevent excess moisture in the filling.
- → How should I store these crumble bars?
-
Store the bars in an airtight container in the refrigerator for up to 5 days. They can also be frozen for up to 3 months. Thaw overnight in the refrigerator before serving.
- → Can I make these gluten-free?
-
Absolutely. Substitute the all-purpose flour with a 1:1 gluten-free flour blend and ensure your oats are certified gluten-free. The texture and taste remain delicious.
- → Why must the bars cool completely before slicing?
-
The cream filling needs time to set properly as it cools. Cutting while warm will cause the bars to crumble and lose their shape. Refrigerating for at least 2 hours ensures clean, neat slices.
- → What other fruits can I use?
-
Nectarines, apricots, berries, or sliced apples all work beautifully. Adjust the sugar slightly based on the fruit's natural sweetness. Berries may need less cornstarch due to their lower pectin content.
- → Can I prepare these bars ahead of time?
-
Yes, these bars actually taste better the next day as flavors meld together. Prepare up to 24 hours before serving, or freeze for longer storage. Bring to room temperature for 15-20 minutes before serving.
