 Save to Pinterest
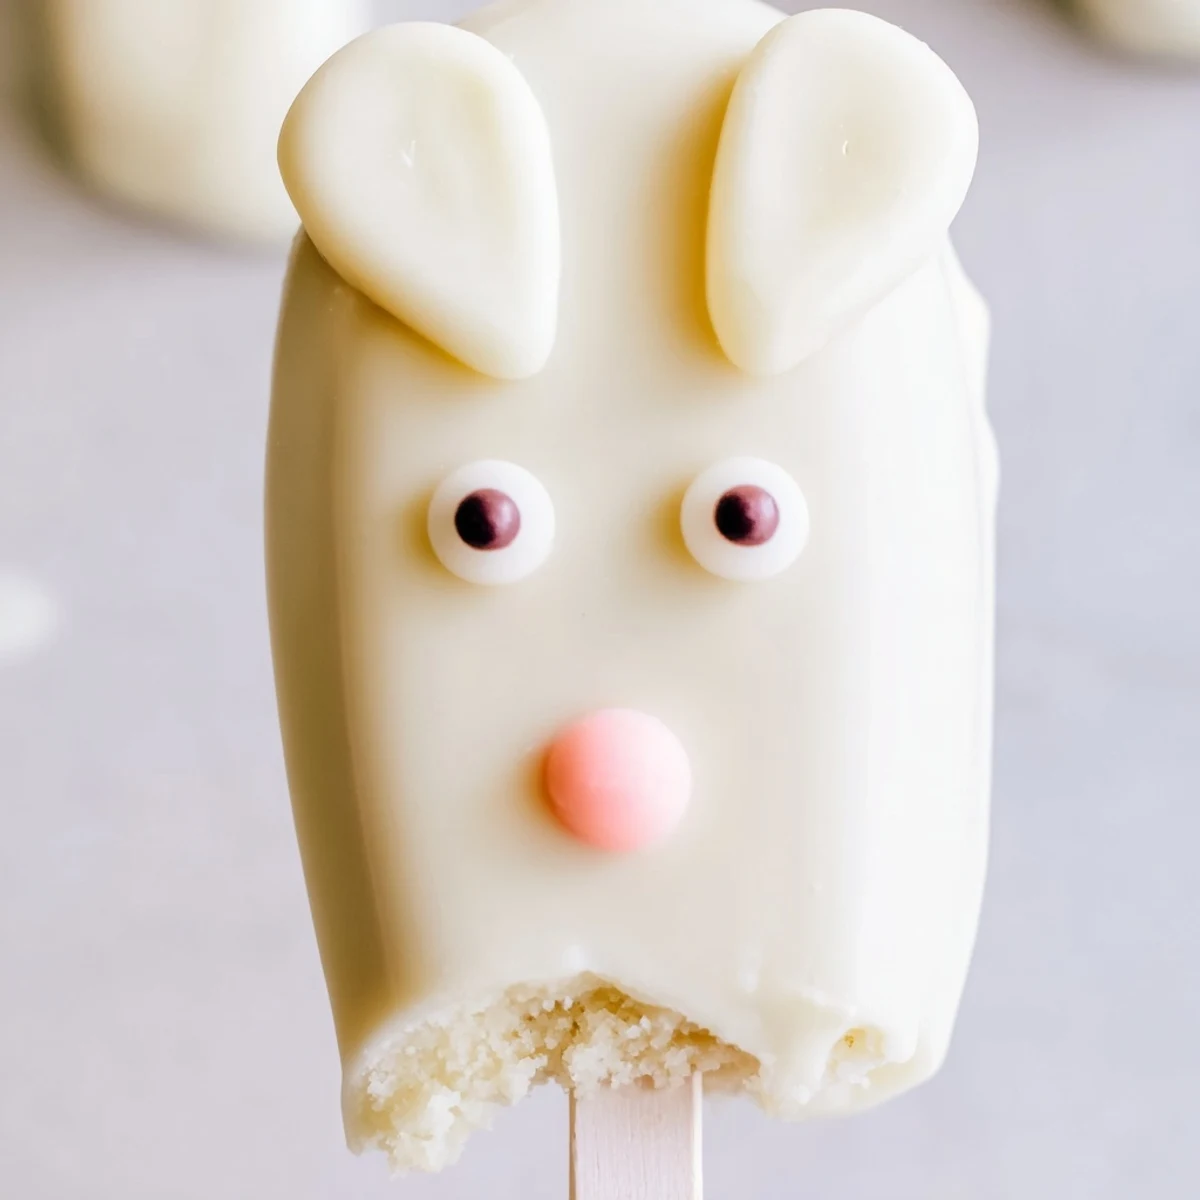
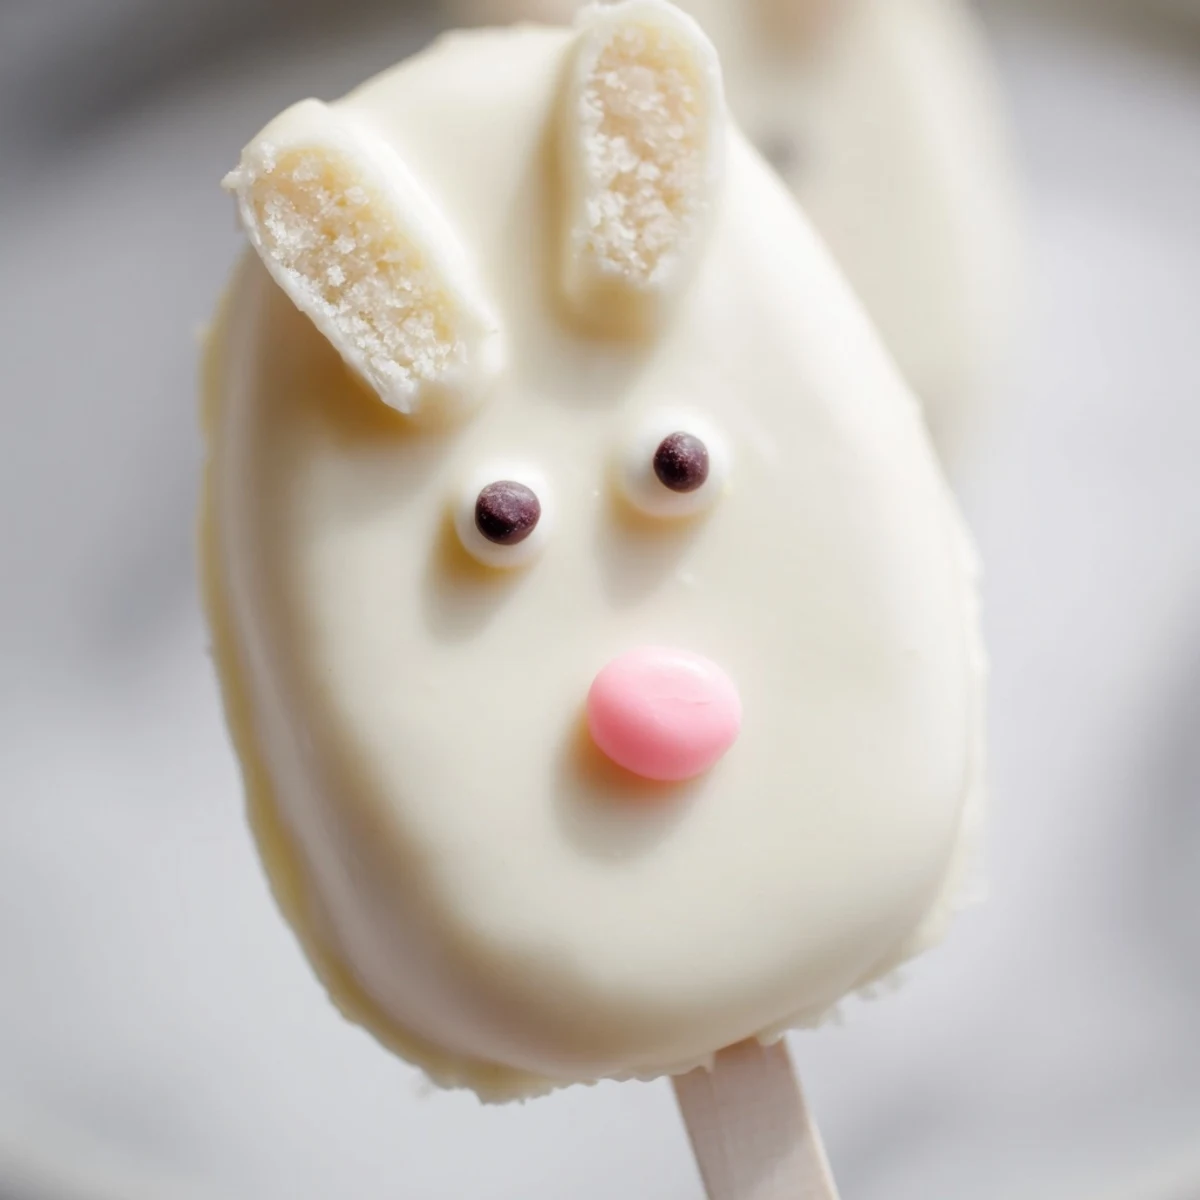
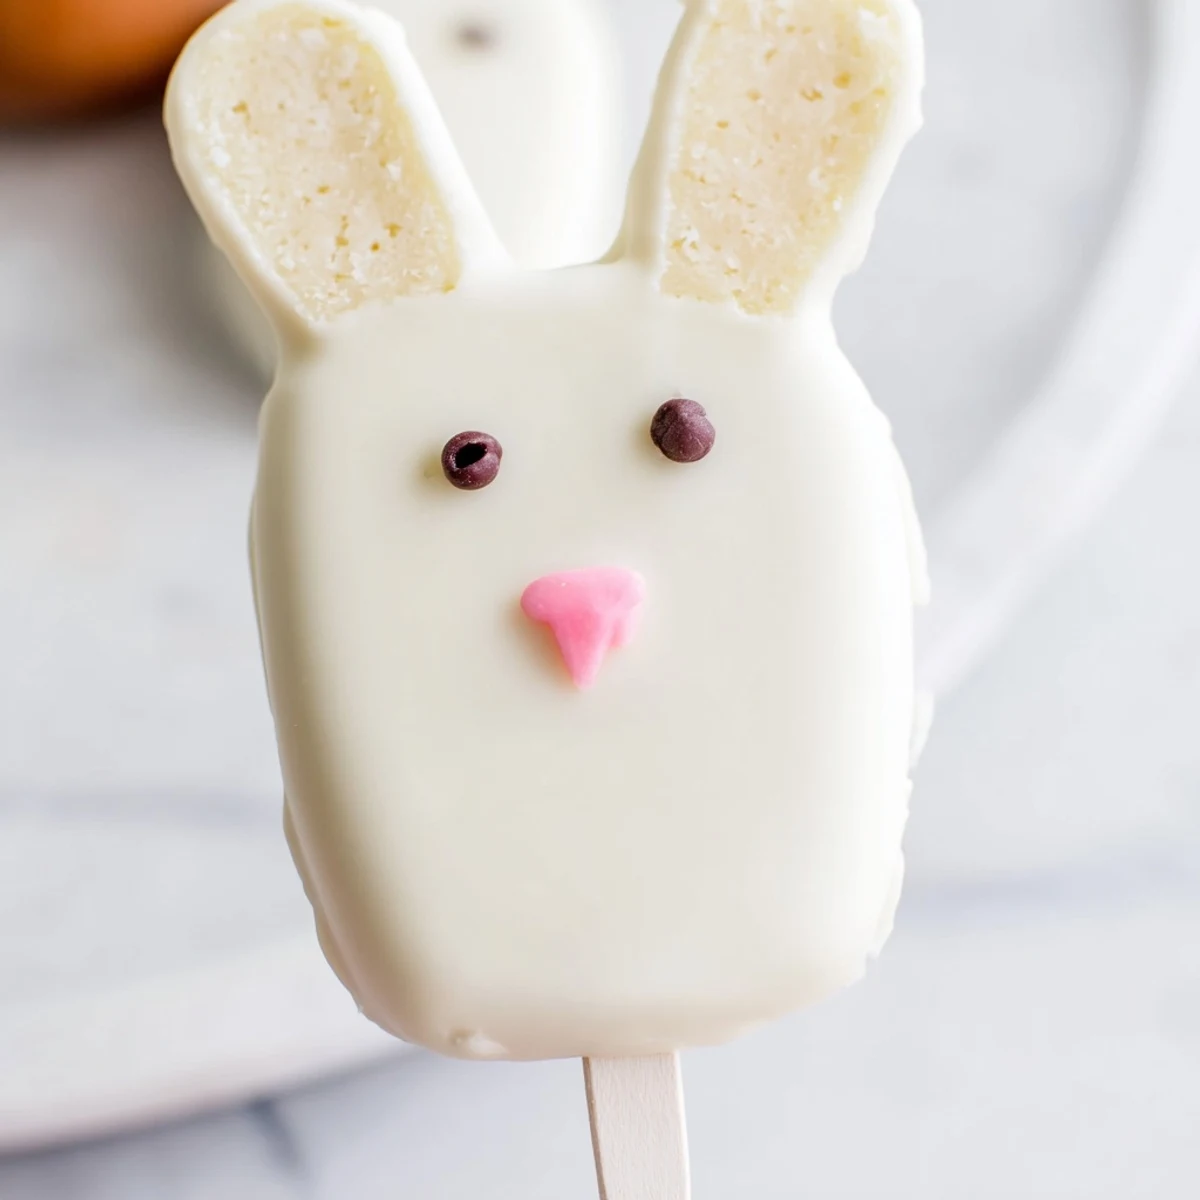
 These charming bunny-shaped cakesicles blend crumbled vanilla cake with cream cheese and butter, creating a perfectly moist center. Each treat is dipped in luxurious white chocolate and decorated with festive details like candy eyes, sprinkle noses, and fondant ears.
The preparation comes together in just 25 minutes of active time, making them ideal for busy holiday schedules. Kids love helping shape the bunny faces and adding personalized decorations. The white chocolate coating provides a creamy sweetness that balances the tender cake interior perfectly.
Store your finished creations in the refrigerator for up to three days, though they rarely last that long! Experiment with different cake flavors, colored coatings, or marbled chocolate effects to create unique variations that will delight both children and adults at your spring gatherings.
The kitchen counter looked like a pastel explosion had been contained to one corner of the room. My daughter had begged me to make "those bunny things on Instagram" for weeks, and honestly I was skeptical about whether we could pull off something that looked remotely Pinterest-worthy without crying over melted chocolate everywhere.
Last Easter, my niece accidentally dipped her bunny cakesicle sideways into the chocolate, creating what she called "the swimming bunny." We laughed so hard that "swimming bunnies" became an intentional variation at our house now. Sometimes the mistakes become the best traditions.
Ingredients
- Vanilla cake crumbs: Use leftover cake or cupcakes, whether homemade from your favorite recipe or grabbed from the bakery section when you are short on time
- Cream cheese: Room temperature is non-negotiable here because cold cream cheese will leave you with lumpy, stubborn mixture that refuses to cooperate
- Unsalted butter: Softened butter helps bind everything together into that perfect dough-like consistency that holds its shape beautifully
- Powdered sugar: Adds just enough sweetness to balance the tangy cream cheese while helping the mixture hold together
- Vanilla extract: Pure vanilla makes everything taste better, so do not skip this even if it seems like a small amount
- White chocolate or candy melts: High-quality melts temper better than chips, and the smoother your chocolate, the more professional your finished cakesicles will look
- Edible gel food coloring: Gel coloring works better than liquid for painting on details because it will not seize your chocolate like water-based coloring can
- Cakesicle sticks: Insert these before chilling so they set firmly in place
- Sprinkles and decorations: Have fun with candy eyes, fondant ears, or whatever catches your eye in the baking aisle
Instructions
- Mix the cake base:
- Combine cake crumbs, cream cheese, butter, powdered sugar, and vanilla in a medium bowl, mixing until everything comes together into a dough that holds its shape when you squeeze it.
- Shape into bunnies:
- Divide the mixture into eight portions and gently press each into a flattened oval shape, slightly pointed at the top for ears.
- Add the sticks:
- Press a cakesicle stick about halfway into each bunny shape, then place everything in the refrigerator for at least 20 minutes until firm.
- Melt the chocolate:
- Heat white chocolate in microwave-safe bowl in 30 second bursts, stirring between each interval until completely smooth and pourable.
- Dip the bunnies:
- Dip each chilled cakesicle into the melted chocolate, letting any excess drip off before placing on parchment paper.
- Decorate quickly:
- Add candy eyes, sprinkle noses, or fondant ears while the chocolate is still soft so everything sticks in place.
- Set and serve:
- Let the chocolate harden completely at room temperature or speed things up with 10 minutes in the refrigerator.
 Save to Pinterest
 These became an instant tradition after my daughter took one bite and announced they were "better than the Easter bunny himself could make." High praise from a seven year old who takes her holiday treats very seriously.
Working With Chocolate
White chocolate can be temperamental and tends to seize if even a tiny drop of water gets into it. Always dry your bowls and utensils completely, and if your chocolate does seize, stir in a teaspoon of vegetable oil to smooth it out again.
Making Ahead
You can form and chill the uncoated cake shapes up to two days in advance. Store them in an airtight container in the refrigerator, then dip and decorate the day before your celebration for the freshest looking results.
Decoration Ideas
Keep some extra melted white chocolate tinted with food coloring for painting on pink noses and inner ears. Gel coloring works best because it will not thin your chocolate the way liquid coloring does.
- Use edible markers to draw whiskers on completely set chocolate for extra detail
- Press pastel sprinkles into the wet coating for an instant festive look
- Try marbling pink food coloring through white chocolate before dipping for a swirled effect
 Save to Pinterest
 These whimsical little treats bring out the kid in everyone who makes them. Happy Easter and may your chocolate stay smooth and your bunny ears stay upright.
Recipe FAQs
- → Can I make these cakesicles ahead of time?
-
Yes! You can prepare the cake mixture and shape the bunny forms up to 2 days in advance. Store them in an airtight container in the refrigerator until ready to dip in chocolate. Once decorated, they'll keep fresh for 3 days when properly stored.
- → What other cake flavors work well for these treats?
-
While vanilla creates a classic base, chocolate cake provides rich contrast against the white coating. Lemon, red velvet, or funfetti cake also create beautiful and delicious variations. Just ensure your cake is thoroughly cooled before crumbling.
- → Do I need a special cakesicle mold?
-
A mold helps create uniform shapes, but it's not essential. You can hand-form the bunny faces using your hands or cookie cutters. The key is achieving a consistent thickness so they heat evenly when dipped and maintain their shape on the sticks.
- → How do I prevent the cake mixture from falling off the sticks?
-
Chill your shaped bunnies for at least 20-30 minutes before inserting sticks. Push the stick about halfway into the cake, then gently twist and press the mixture around the base to secure it. The chilled cake holds together much better during dipping.
- → Can I use candy melts instead of real white chocolate?
-
Absolutely! White candy melts actually work beautifully because they're designed for coating and set firmly at room temperature. They're often easier to work with than tempered chocolate and come in various colors for decorating.
- → What's the best way to create bunny ears?
-
Fondant or modeling chocolate rolled thin and cut into ear shapes works wonderfully. You can also use pretzel sticks dipped in pink chocolate, or pipe ear shapes directly onto the coated cakesicle before the chocolate hardens. Get creative with what you have on hand!
