 Save to Pinterest
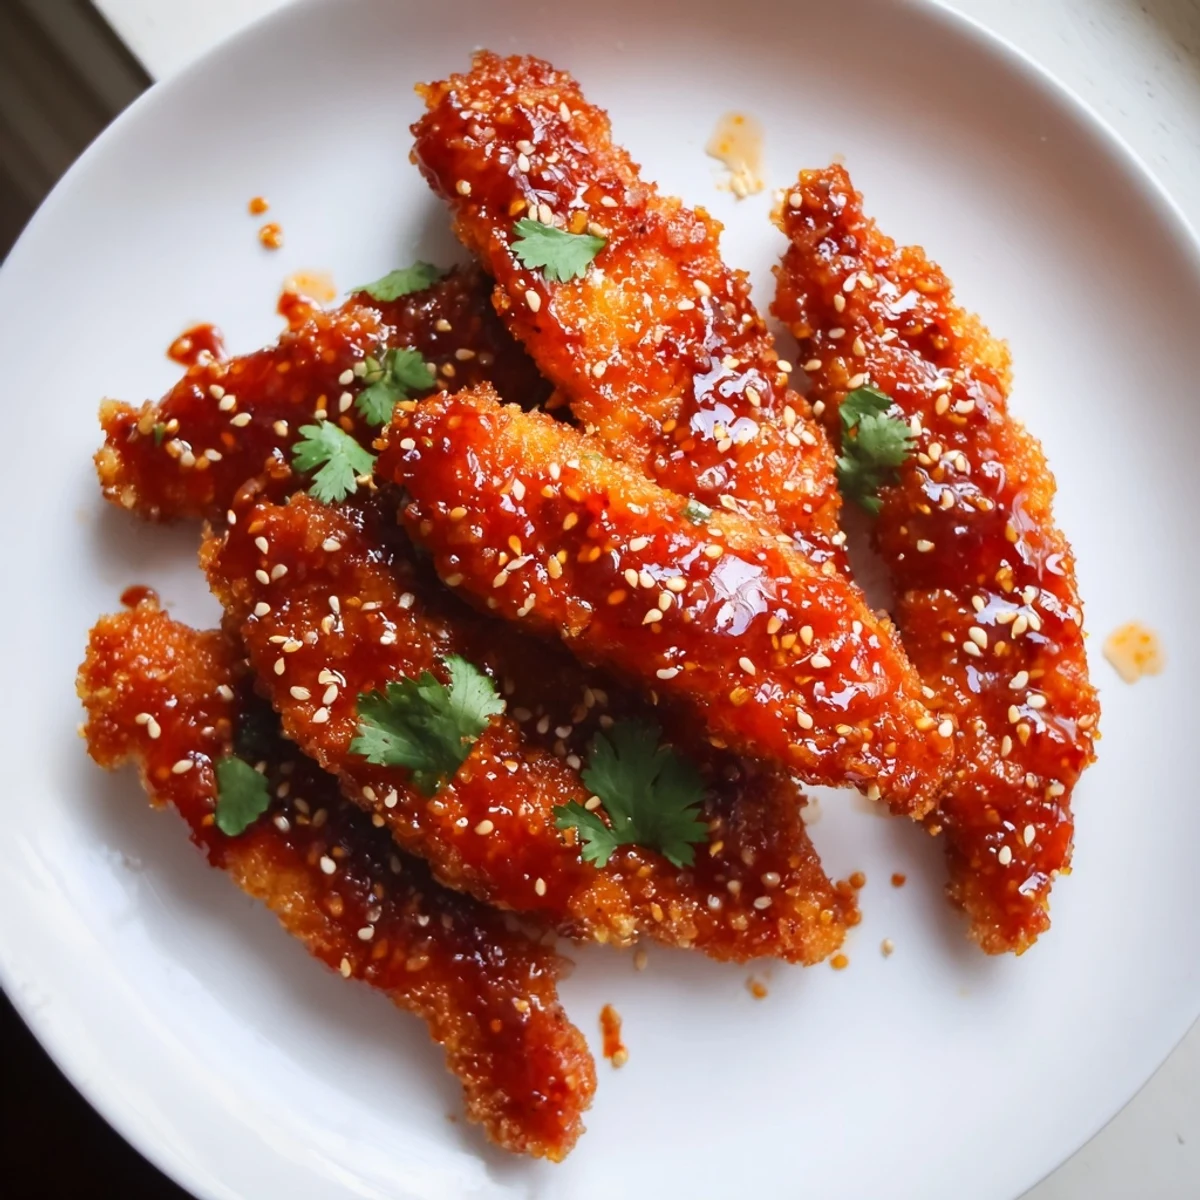
 These Thai sticky chicken fingers are crispy panko-crusted chicken strips tossed in a luscious glaze made from sweet chili sauce, honey, soy sauce, and a kick of sriracha. The chicken is marinated in a fragrant blend of soy sauce, lime juice, fish sauce, garlic, and ginger before being coated and baked or fried to golden perfection.
Ready in just 45 minutes, they work beautifully as a crowd-pleasing appetizer or a satisfying main dish served alongside jasmine rice and a crisp cucumber salad. Garnish with sesame seeds and fresh cilantro for a restaurant-quality finish.
The sizzle of chicken hitting a hot pan on a rainy Tuesday evening taught me more about Thai flavors than any cookbook ever could. I had leftover sweet chili sauce sitting in my fridge door for weeks, daring me to do something with it. What started as a desperate weeknight dinner turned into the most requested dish at every gathering I have hosted since. That sticky, caramelized glaze has a way of making people close their eyes on the first bite.
My neighbor walked in unannounced one evening while I was tossing these chicken fingers in their sticky glaze. She stood in the kitchen doorway, sniffed the air dramatically, and declared she was not leaving until she got a plate. We ended up sitting on the kitchen floor eating the entire batch with our fingers, laughing about how neither of us owned enough napkins.
Ingredients
- Chicken tenders or breast strips (600 g): Tenders save you the trouble of trimming, but breast works just as well if you cut uniform strips so they cook evenly.
- Soy sauce: The backbone of both the marinade and the sticky sauce, so use a decent brand you actually enjoy the taste of on its own.
- Lime juice: Fresh is non negotiable here. The bottled stuff tastes flat and throws off the bright tang this dish relies on.
- Fish sauce: It smells assertive on its own but disappears into the marinade, adding a salty depth that soy sauce cannot replicate alone.
- Garlic and ginger: Freshly grated ginger and minced garlic wake up the marinade in a way their dried counterparts never will.
- Flour, eggs, and panko breadcrumbs: This classic three step coating creates the crunchy shell that holds up under the sticky sauce without turning soggy.
- Sweet chili sauce: The star of the glaze. A good bottled one saves time and delivers consistent sweet heat.
- Honey: Balances the sriracha and helps the sauce thicken into that gorgeous glossy coating.
- Rice vinegar: Adds a mild acidity that brightens the whole sauce without making it sharp.
- Sriracha: Totally optional but even a small amount gives the glaze a gentle warmth that lingers pleasantly.
- Sesame oil: Just half a teaspoon rounds everything out with a nutty aroma that makes the dish smell as good as it tastes.
- Sesame seeds, cilantro, and lime wedges: These finishing touches take the presentation from weeknight dinner to something worth photographing.
Instructions
- Marinate the chicken:
- Whisk together the soy sauce, lime juice, fish sauce, minced garlic, and grated ginger in a bowl. Toss the chicken strips in the mixture until every piece is coated, then cover and let them soak up the flavors for at least 15 minutes while you set up everything else.
- Set up the coating station:
- Arrange three shallow bowls side by side with flour in the first, beaten eggs in the second, and panko mixed with salt and pepper in the third. This assembly line keeps your hands cleaner and your rhythm steady.
- Prepare to cook:
- Heat your oven to 200 degrees Celsius and line a baking sheet with parchment paper, or heat about a centimeter of oil in a wide pan for shallow frying if you prefer that golden crunch.
- Coat each piece:
- Take a strip from the marinade, shake off the excess, and roll it through flour, then egg, then press it firmly into the panko until every side is well covered. The harder you press the panko on, the more texture you get later.
- Cook until golden:
- Arrange the coated pieces on your baking sheet and bake for 18 to 22 minutes, flipping them halfway through, or fry them in the hot pan for about 3 to 4 minutes per side until deeply golden and cooked through.
- Make the sticky sauce:
- While the chicken cooks, combine the sweet chili sauce, honey, soy sauce, rice vinegar, sriracha, and sesame oil in a small saucepan over medium heat. Stir gently for 3 to 5 minutes until the sauce is warmed through and thickens just enough to coat the back of a spoon.
- Toss and glaze:
- Transfer the hot chicken fingers into a large bowl, pour the warm sauce over them, and toss gently with tongs until every piece is wrapped in that glossy, sticky coating.
- Finish and serve:
- Pile the glazed chicken onto a platter, scatter sesame seeds and chopped cilantro over the top, and tuck lime wedges around the edges so people can squeeze fresh juice over their portions.
 Save to Pinterest
 There is something about a platter of sticky, golden chicken fingers that turns adults into kids again. I watched my usually composed brother in law lick his fingers at a family barbecue without a hint of embarrassment. That sauce will do that to people.
Serving Ideas That Actually Work
Piled over a bowl of steamed jasmine rice, these chicken fingers become a full meal that feels special without any extra effort. A simple cucumber salad dressed with rice vinegar and a pinch of sugar cuts through the richness beautifully. For parties, serve them on a wooden board with small bowls of extra sweet chili sauce on the side for dipping.
Making It Your Own
The beauty of this recipe is how easily it bends to your pantry. Swap the sriracha for a spoonful of gochujang if you want a deeper, fermented heat. Peanut butter stirred into the sauce adds a satay like richness that pairs wonderfully with the crispy chicken. You can even bake these as nugget sized pieces for kids who prefer smaller bites they can grab with their hands.
Getting Ahead and Storing Leftovers
The chicken can be marinated and coated up to a day in advance, kept covered in the fridge until you are ready to cook. Leftovers store well in an airtight container for two days, though the coating loses some of its crunch. Reheat them in a hot oven or air fryer for a few minutes to bring back texture.
- Freeze uncooked coated strips on a sheet pan, then transfer to a bag for a quick meal straight from the freezer.
- Always make extra sauce because someone will ask for more.
- Let the chicken rest for two minutes after cooking before glazing so the coating sets firmly.
 Save to Pinterest
 Keep a stack of napkins nearby and do not fight the sticky fingers. Some dishes are meant to be a little messy, and this one earns every smear of sauce on your hands.
Recipe FAQs
- → Can I bake these chicken fingers instead of frying?
-
Yes, absolutely. Bake the coated chicken strips on a parchment-lined baking sheet at 200°C (400°F) for 18–22 minutes, flipping halfway through, until golden and cooked through. This method yields crispy results with less oil.
- → How do I get extra crispy chicken fingers?
-
For maximum crunch, double-coat the chicken by repeating the egg and panko steps a second time. Also, make sure your panko breadcrumbs are fresh and press them firmly onto each strip for even coverage.
- → Can I make the Thai sticky sauce ahead of time?
-
Yes, the sauce can be prepared a day in advance and stored in an airtight container in the refrigerator. Reheat it gently in a saucepan over low heat before tossing with the freshly cooked chicken fingers.
- → What can I substitute for fish sauce in the marinade?
-
If you don't have fish sauce, you can substitute it with an equal amount of soy sauce mixed with a splash of lime juice. The flavor profile will shift slightly but will still deliver a delicious umami depth.
- → How should I store and reheat leftovers?
-
Store leftover chicken fingers in an airtight container in the refrigerator for up to 3 days. To reheat and restore crispiness, place them on a baking sheet in a 190°C (375°F) oven for 8–10 minutes. Avoid microwaving, as it will make the coating soggy.
- → Is there a gluten-free version of this dish?
-
Yes. Use gluten-free all-purpose flour, gluten-free panko breadcrumbs, and tamari instead of regular soy sauce. Double-check all sauce labels, including sweet chili sauce and sriracha, for hidden gluten.
